Integration with FusionCharts
FusionCharts is a charting library that provides a wide range of interactive charts, maps, and graphs. This tutorial describes how to integrate WebDataRocks with FusionCharts and visualize your data from the component.
Supported chart and map types
Charts:
- area2d (demo)
- bar2d (demo)
- bar3d (demo)
- column2d (demo)
- column3d (demo)
- doughnut2d (demo)
- doughnut3d (demo)
- line (demo)
- marimekko (demo)
- msarea (demo)
- msbar2d (demo)
- msbar3d (demo)
- mscolumn2d (demo)
- mscolumn3d (demo)
- mscolumn3dlinedy (demo)
- msline (demo)
- msspline (demo)
- mssplinearea (demo)
- pareto2d (demo)
- pareto3d (demo)
- pie2d (demo)
- pie3d (demo)
- radar (demo)
- spline (demo)
- splinearea (demo)
- stackedarea2d (demo)
- stackedbar2d (demo)
- stackedcolumn2d (demo)
- stackedcolumn3d (demo)
Maps:
- maps/worldwithcountries (demo)
In case the chart you need is not on the list, you can implement a custom logic of data processing in the options.prepareDataFunction parameter of fusioncharts.getData().
Please follow these steps to integrate your pivot table component with FusionCharts.
Step 1. Add WebDataRocks to your project
Step 1.1. Complete the integration guide. Your code of the web page with WebDatarocks should look similar to the following:
<html>
  <head>
    <script src="https://cdn.webdatarocks.com/latest/webdatarocks.js"></script>
    <script src="https://cdn.webdatarocks.com/latest/webdatarocks.toolbar.min.js"></script>
    <link href="https://cdn.webdatarocks.com/latest/webdatarocks.min.css" rel="stylesheet"/>
  </head>

  <body>
    <div id="pivotContainer"></div>
    <script>
      const pivot = new WebDataRocks({
        container: "#pivotContainer",
        toolbar: true,
      });
    </script>
  </body>
</html>
Step 1.2. Create a report for WebDataRocks — connect to the data source and define which fields should be displayed in rows, columns, and measures:
const pivot = new WebDataRocks({
  container: "#pivotContainer",
  toolbar: true,
  report: {
    dataSource: {
      filename: "https://cdn.webdatarocks.com/data/data.csv",
    },
    slice: {
      rows: [
        {
          uniqueName: "Country",
        },
      ],
      columns: [
        {
          uniqueName: "Business Type",
        },
        {
          uniqueName: "Measures",
        },
      ],
      measures: [
        {
          uniqueName: "Price",
          aggregation: "sum",
        },
      ],
    },
  },
});
The fields you’ve specified in the report will be shown on the chart.
Step 2. Add FusionCharts
Step 2.1. Include fusioncharts.js into your web page:
<script type="text/javascript" src="https://cdn.fusioncharts.com/fusioncharts/latest/fusioncharts.js"></script>
Step 2.2. Include a theme for FusionCharts:
<script type="text/javascript" src="https://cdn.fusioncharts.com/fusioncharts/latest/themes/fusioncharts.theme.fusion.js"></script>
Step 2.3. Add the <div> container where the chart will be rendered:
<div id="fusionchartsContainer"></div>
Step 3. Show the data from the pivot table on the chart
Step 3.1. Include the WebDataRocks Connector for FusionCharts:
<script src="https://cdn.webdatarocks.com/latest/webdatarocks.fusioncharts.js"></script>
The Connector provides the fusioncharts.getData() method, which gets data from WebDataRocks and converts it to the format required for a specific chart type.
Step 3.2. If we call the fusioncharts.getData() method before WebDataRocks is fully loaded, it will return an empty result. To know when WebDataRocks is ready to provide data for the chart, handle the reportcomplete event:
const pivot = new WebDataRocks({
  container: "#pivotContainer",
  toolbar: true,
  report: {
    // ...
  },
  reportcomplete: onReportComplete
});

function onReportComplete() {
  // Unsubscribing from reportcomplete
  // We need it only to track the initialization of WebDataRocks
  pivot.off("reportcomplete");
  createChart();
}
Now the chart will be created only when the data is loaded and the report is ready.
Step 3.3. Implement the createChart() function. It will use the fusioncharts.getData() method from the Connector:
function createChart() {
  const columnChart = new FusionCharts({
    type: "mscolumn2d",
    renderAt: "fusionchartsContainer",
    width: "100%",
    height: 450
  });

  pivot.fusioncharts.getData(
    {
      type: columnChart.chartType()
    },
    // Function called when data for the chart is ready
    function(chartConfig) {
      // Applying the chart theme
      chartConfig.chart.theme = "fusion";
      // Passing the data to the chart
      columnChart.setJSONData(chartConfig);
      columnChart.render();
    },
    // Function called on report changes (filtering, sorting, etc.)
    function(chartConfig) {
      // Applying the chart theme
      chartConfig.chart.theme = "fusion";
      // Passing the data to the chart
      columnChart.setJSONData(chartConfig);
    }
  );
}
If the Connector does not support the desired chart type or you need to preprocess the data differently, implement a function that handles the data processing and pass it to fusioncharts.getData() as the options.prepareDataFunction parameter.
To learn more about configurations available for FusionCharts, please refer to the FusionCharts documentation.
Step 4. See the result
Open your web page in the browser to see an interactive dashboard with WebDataRocks and FusionCharts. The column chart shows the data from WebDataRocks and reacts instantly to any changes in the report.
Check out the full code
After completing this tutorial, the full code of the web page should look as follows:
<html>
  <head>
    <script src="https://cdn.webdatarocks.com/latest/webdatarocks.js"></script>
    <script src="https://cdn.webdatarocks.com/latest/webdatarocks.toolbar.min.js"></script>
    <link href="https://cdn.webdatarocks.com/latest/webdatarocks.min.css" rel="stylesheet" />

    <script type="text/javascript" src="https://cdn.fusioncharts.com/fusioncharts/latest/fusioncharts.js"></script>
    <script type="text/javascript" src="https://cdn.fusioncharts.com/fusioncharts/latest/themes/fusioncharts.theme.fusion.js"></script>

    <script src="https://cdn.webdatarocks.com/latest/webdatarocks.fusioncharts.js"></script>
  </head>

  <body>
    <div id="pivotContainer"></div>
    <div id="fusionchartsContainer"></div>
    <script>
      const pivot = new WebDataRocks({
        container: "#pivotContainer",
        toolbar: true,
        report: {
          dataSource: {
            filename: "https://cdn.webdatarocks.com/data/data.csv",
          },
          slice: {
            rows: [
              {
                uniqueName: "Country",
              },
            ],
            columns: [
              {
                uniqueName: "Business Type",
              },
              {
                uniqueName: "Measures",
              },
            ],
            measures: [
              {
                uniqueName: "Price",
                aggregation: "sum",
              },
            ],
          },
        },
        reportcomplete: onReportComplete,
      });

      function onReportComplete() {
        pivot.off("reportcomplete");
        createChart();
      }

      function createChart() {
        const columnChart = new FusionCharts({
          type: "mscolumn2d",
          renderAt: "fusionchartsContainer",
          width: "100%",
          height: 450,
        });

        pivot.fusioncharts.getData(
          {
            type: columnChart.chartType(),
          },
          function (chartConfig) {
            chartConfig.chart.theme = "fusion";
            columnChart.setJSONData(chartConfig);
            columnChart.render();
          },
          function (chartConfig) {
            chartConfig.chart.theme = "fusion";
            columnChart.setJSONData(chartConfig);
          },
        );
      }
    </script>
  </body>
</html>
Live example
This sample shows how to integrate WebDataRocks Pivot Table with FusionCharts:
See also
| Feature | Availability |
|---|---|
| – Grid | |
| Virtual grid that ensures smooth rendering and scrolling the rows | |
| Sort the members of the rows and columns | |
| Sort by values | |
| Drag and drop the hierarchies on the grid | |
| Drill through the cells | |
| Drill the hierarchies up and down | |
| Expand and collapse the hierarchies on the grid | |
| Resize the rows and columns on the grid | |
| Grand totals and subtotals | |
| Compact pivot table | |
| Classic pivot table | |
| Flat table | |
| Add multiple fields to the rows | |
| Add multiple fields to the columns | |
| Add multiple fields to the measures | |
| Create multilevel hierarchies | |
Select the string field as a measure (with count or distinctcount aggregation applied) |
|
| Select cells | |
| Copy selected cells | |
| Keyboard shortcuts to navigate on the grid | * |
| Highlight the rows and columns via the conditional formatting | |
| – Filter | |
| Filter by members using the checkbox | |
| Filtering by members using the search input box | |
| Filtering by value (Top X records) | |
| Filtering by value (Bottom X records) | |
| Report filters | |
| – Fields | |
| Adding and editing calculated values via UI | |
| Dragging fields in the Field List | |
| Displaying hierarchy levels in the Field List | |
| The Expand All option in the Field List | |
| The Field List in the drill-through pop-up window | |
| – Aggregation functions | |
| “sum” | |
| “count” | |
| “distinctcount” | |
| “average” | |
| “median” | |
| “product” | |
| “min” | |
| “max” | |
| “percent” | |
| “percentofcolumn” | |
| “percentofrow” | |
| “index” | |
| “difference” | |
| “%difference” | |
| “stdevp” (Population Standard Deviation) | |
| “stdevs” (Sample Standard Deviation) | |
| “runningtotals” | |
| – The Toolbar | |
| Save a report | |
| Open a report | |
| Conditional formatting | |
| Number formatting | |
| Connect to a CSV data source | |
| Connect to a JSON data source | |
| Full-screen mode | |
| – Export | |
| Print reports | |
| Export reports to HTML | |
| Export reports to MS Excel | |
| Export reports to PDF | |
| Add custom headers and footers (PDF, HTML) | |
| Add custom sheet names (Excel) | |
| – Options | |
| Language localization | |
| Apply a pre-defined report theme | |
| Date and time patterns | |
| – Integration with charting libraries | |
| amCharts | |
| Highcharts | |
| Google Charts | |
| FusionCharts | |
| Any charting library | |
| – Integration with frameworks and web technologies | |
| React | |
| Angular | |
| Vue | |
| Django | |
| Jupyter | |
| Flutter | |
| jQuery | |
| AngularJS |
* WebDataRocks supports basic keyboard shortcuts for navigation:
UpArrow,DownArrow,LeftArrow, andRightArrowto move the focus when navigating between cells.Shift + UpArrow,Shift + DownArrow,Shift + LeftArrow, andShift + RightArrowto extend cell selection.Ctrl + A(Command + A|Control + Aon macOS) to select all cells.Ctrl + C(Command + Con macOS) to copy selected cells.Spaceto expand and collapse a hierarchy.
Options available for developers:
| Feature | Availability |
|---|---|
| – General options | |
| Show or hide the Toolbar | |
| Show or hide the Field List | |
| Open or close the Field List via UI or API | |
| Show or hide the aggregation selection control in the Field List | |
| Show or hide the “Add calculated value” control in the Field List | |
| Enable or disable the drill-through feature | |
| Configure a slice in the drill-through pop-up window | |
| Show or hide the Field List in the drill-through pop-up window | |
| Show or hide the sorting controls | |
| Enable a default slice for the component | |
| Set a default sorting type for the hierarchy members: “asc”, “desc” or “unsorted” | |
| Change the aggregation labels via localization | |
| Define data types in CSV | |
| Define data types in JSON | |
| Different field separators for CSV | |
| Set global options for all reports | |
| Customize the Toolbar | |
| Define custom report themes | |
| Customize the context menu | |
| Expand or collapse all hierarchy members via API | |
| – Grid options | |
| Set the grid form. Possible values are: “compact”, “classic”, “flat” | |
| Set the grid title | |
| Show or hide the filtering controls | |
| Show or hide spreadsheet headers | |
| Show or hide subtotals | |
| Show or hide grand totals in the rows and/or columns | |
| Show or hide the hierarchy captions | |
| Show or hide report filters on the grid |
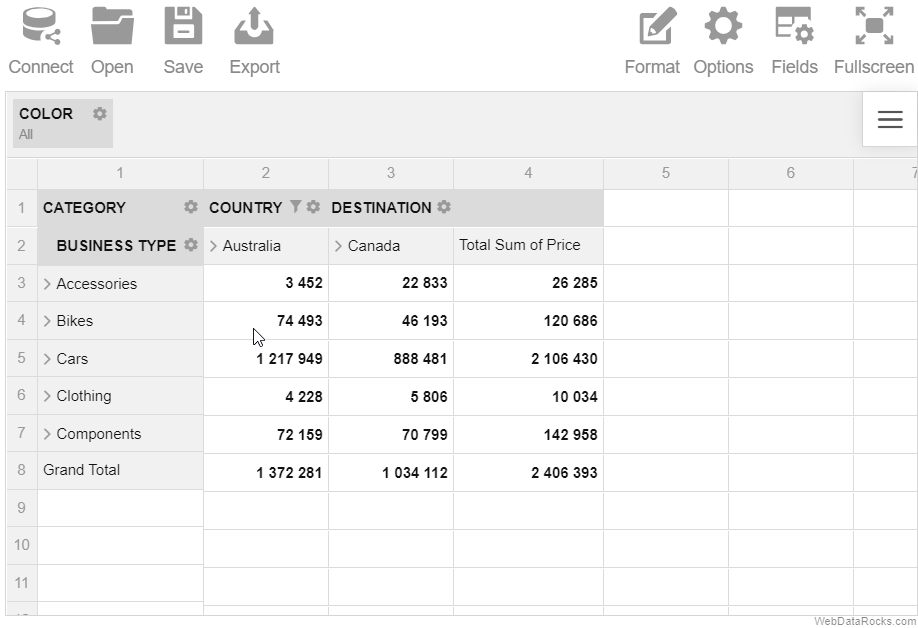
Use the drag-and-drop feature to organize and restructure your report in real time.
Example
Drag and drop the hierarchies between the rows, columns and report filters right on the grid.
Use the drill-down feature to drill into the different levels of a hierarchy. This operation helps to reveal more details of your data and get a more specific view of the hierarchies. Drill back up when you need to get a general view of the data.
Example
Starting from a country level, drill down to a city level that can be further drilled down to an address level. Drill up the levels to return to the previous view of the hierarchy.
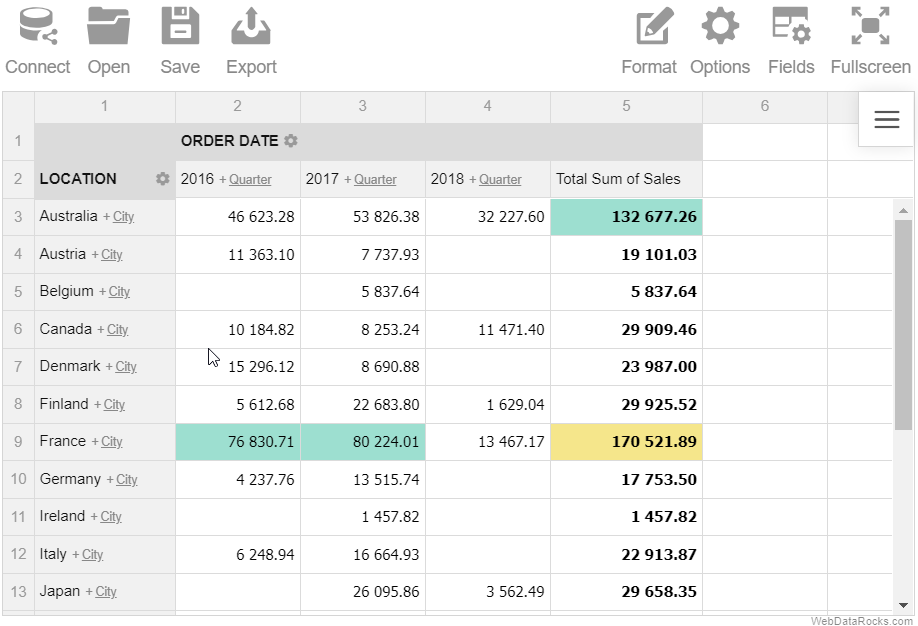
Note. This feature can be used only with the multilevel hierarchies. Refer to the Data types guide for details on how to define levels in the data types.
Use the expand and collapse operations to analyze the data on different levels of detail.
Example
Expand the Category hierarchy to display the members of the next (Business Type) hierarchy.
In a classic form:
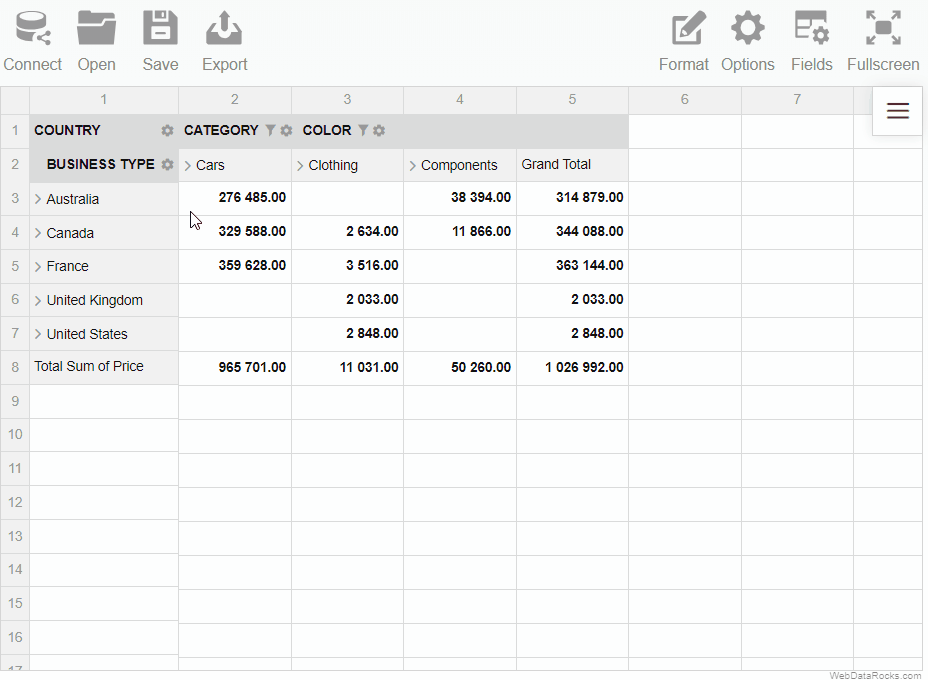
In a compact form:
In this tutorial, you will learn how to integrate WebDataRocks with jQuery.
jQuery is a JavaScript library which purpose is to simplify using JavaScript on your website. It helps to handle HTML/DOM/CSS manipulation, HTML event methods, AJAX calls, and more.
Step 1. Create a new project
Step 1.1. Create a new folder for the project, e.g. my-jquery-project/.
Step 1.2. Create an index.html file inside my-jquery-project/ and include jQuery from the Google CDN to the <head> section:
<!DOCTYPE html>
<html>
<head>
    <title>My WebDataRocks & jQuery project</title>
    <script src="https://ajax.googleapis.com/ajax/libs/jquery/3.3.1/jquery.min.js"></script>
</head>
<body>
</body>
</html>
Step 2. Add WebDataRocks dependencies
Step 2.1. Create a <div> container for a pivot table component:
<!DOCTYPE html>
<html>
<head>
    <title>My WebDataRocks & jQuery project</title>
    <script src="https://ajax.googleapis.com/ajax/libs/jquery/3.3.1/jquery.min.js"></script>
</head>
<body>
    <div id="wdr-component">The pivot table control will appear here</div>
</body>
</html>
Step 2.2. Add the WebDataRocks scripts and styles to the <head> section:
<!DOCTYPE html>
<html>
<head>
    <title>My WebDataRocks & jQuery project</title>
    <script src="https://ajax.googleapis.com/ajax/libs/jquery/3.3.1/jquery.min.js"></script>
    <link href="https://cdn.webdatarocks.com/latest/webdatarocks.min.css" rel="stylesheet" />
    <script src="https://cdn.webdatarocks.com/latest/webdatarocks.toolbar.min.js"></script>
    <script src="https://cdn.webdatarocks.com/latest/webdatarocks.js"></script>
</head>
<body>
    <div id="wdr-component">The pivot table control will appear here</div>
</body>
</html>
Step 3. Initialize the pivot table component on the page
<!DOCTYPE html>
<html>
<head>
    <title>My WebDataRocks & jQuery project</title>
    <link href="https://cdn.webdatarocks.com/latest/webdatarocks.min.css" rel="stylesheet" />
    <script src="https://cdn.webdatarocks.com/latest/webdatarocks.toolbar.min.js"></script>
    <script src="https://cdn.webdatarocks.com/latest/webdatarocks.js"></script>
    <script src="https://ajax.googleapis.com/ajax/libs/jquery/3.3.1/jquery.min.js"></script>
</head>
<body>
    <div id="wdr-component">The pivot table control will appear here</div>
    <script>
        var pivot = $("#wdr-component").webdatarocks({
            toolbar: true
       });
    </script>
</body>
</html>
Step 4. Load the report
To display the data on the grid, add a report attribute and specify a URL to the report (or define an inline report):
<!DOCTYPE html>
<html>
<head>
    <title>My WebDataRocks & jQuery project</title>
    <link href="https://cdn.webdatarocks.com/latest/webdatarocks.min.css" rel="stylesheet" />
    <script src="https://cdn.webdatarocks.com/latest/webdatarocks.toolbar.min.js"></script>
    <script src="https://cdn.webdatarocks.com/latest/webdatarocks.js"></script>
    <script src="https://ajax.googleapis.com/ajax/libs/jquery/3.3.1/jquery.min.js"></script>
</head>
<body>
    <div id="wdr-component">The pivot table control will appear here</div>
    <script>
        var pivot = $("#wdr-component").webdatarocks({
            toolbar: true,
            report: "https://cdn.webdatarocks.com/reports/report.json"
       });
   </script>
</body>
</html>
Find out more in the CodePen demo.
Init jQuery call
An initial jQuery call for embedding of the component has the following structure:
$("#wdr-component").webdatarocks({
  container: String,
  toolbar: Boolean,
  report: ReportObject | String,
  width: Number,
  height: Number,
  customizeCell: Function,
  global: ReportObject,
  reportcomplete: Function | String
})
This jQuery call embeds the pivot table component into the HTML page and takes as a parameter the id attribute of a container element (i.e., #wdr-component in this example).
Use this method to add the component to the HTML page with all the necessary parameters for the initialization.
Parameters
The list of parameters is the same as for an Init API call.
You can set event handlers as the properties of the initial jQuery call. See the list of events here.
All these parameters are optional. You can run $("#wdr-component").webdatarocks() and the component with an empty grid, the default width and height, and without the Toolbar will be added to the page.
Returns
A reference to the object of the embedded pivot table. You can create multiple instances and work with them on the same web page.
Example
Get a reference to the instance of the component by using the jQuery selector:
var pivot = $("#wdr-component").data("webdatarocks");
Troubleshooting
If you run into any issues during the integration, please create an issue on our GitHub.
WebDataRocks Pivot Table is compatible with modern technologies for web development. The whole process of integration is clear and smooth.
The pivot table component integrates well with React, Angular, Vue, and other popular frameworks.
Check out the following tutorials on integration with frameworks and libraries:
- Integration with React
- Integration with Angular
- Integration with Vue
- Integration with Django
- Integration with Jupyter
- Integration with Flutter
- Integration with jQuery
- Integration with AngularJS
After formatting your CSV data and setting data types for fields, you can start connecting to the data.
Connect to CSV via UI
Step 1. Go to the Connect tab () on the Toolbar.
Step 2. Choose the CSV you want to connect to:
- Local CSV. Use this option to load a file from your local file system.
- Remote CSV. Use this option to load a remote file by its URL or data returned by a server-side script.
Here’s an example of connecting to a remote CSV file:
Connect to CSV programmatically
To load your remote CSV data (a remote CSV file or data returned by a server-side script), specify the URL in the dataSource.filename property:
const pivot = new WebDataRocks({
  container: "#pivotContainer",
  report: {
    dataSource: {
      filename: "URL-to-your-CSV-file"
    }
  }
});
Specify a custom field separator
By default, WebDataRocks supports a comma , or a semicolon ; as a field separator. If fields in your data are separated by another character, e.g., a colon :, you need to specify this character in the dataSource.fieldSeparator property. For example:
report: {
  dataSource: {
    filename: "URL-to-your-CSV-file",
    fieldSeparator: ":"
  }
 }
});
Set a CSV data source for all reports
To set a CSV data source for all reports, specify it in the Global Object:
const pivot = new WebDataRocks({
  container: "#pivotContainer",
  // Other parameters
  global: {
    dataSource: {
      type: "csv",
      filename: "URL-to-your-CSV-file"
    },
  },
  report: {
    // Your report
  }
});
See an example on CodePen.
See also
After formatting your JSON data and setting data types for fields, you can start connecting to the data.
Connect to JSON via UI
Step 1. Go to the Connect tab () on the Toolbar.
Step 2. Choose the JSON you want to connect to:
- Local JSON. Use this option to load a file from your local file system.
- Remote JSON. Use this option to load a remote JSON file by its URL or data returned by a server-side script.
Connect to JSON programmatically
There are two ways to connect to JSON programmatically:
1) If JSON data is already defined on the page (e.g., in the jsonData variable), specify it in the dataSource.data property:
const pivot = new WebDataRocks({
  container: "#pivotContainer",
  toolbar: true,
  report: {
    dataSource: {
      data: jsonData
    }
  }
});

const jsonData = [
  {
    "Product": "Apple",
    "Price": 2.50
  },
  {
    "Product": "Cherry",
    "Price": 5.25
  }
];
2) If your JSON data is in a file or is returned by a server-side script, specify the URL in the dataSource.filename property:
const pivot = new WebDataRocks({
  container: "#pivotContainer",
  toolbar: true,
  report: {
    dataSource: {
      filename: "URL-to-your-JSON-file"
    }
  }
});
Set a JSON data source for all reports
To set a JSON data source for all reports, specify it in the Global Object:
const pivot = new WebDataRocks({
  container: "#pivotContainer",
  // Other parameters
  global: {
    dataSource: {
      type: "json",
      filename: "URL-to-your-JSON-file"
    },
  },
  report: {
    // Your report
  }
});
See an example on CodePen.
import { Component } from "@angular/core";
import { WebdatarocksPivotModule } from "@webdatarocks/ngx-webdatarocks"

@Component({
  selector: "app-root",
  standalone: true,
  imports: [WebdatarocksPivotModule],
  templateUrl: "./app.component.html",
  styleUrls: ["./app.component.css"]
})
export class AppComponent {
  globalReportJson = {
    dataSource: {
      type: "json",
      filename: "URL-to-your-JSON-file"
    }
  };

  reportJson = {
    // Your report
  };
}
<app-wbr-pivot
 [toolbar]="true"
 [global]="globalReportJson"
 [report]="reportJson">
</app-wbr-pivot>
See also
- Supported JSON formats
- Setting data types
- Creating multilevel hierarchies in JSON
- Metadata object for JSON
This detailed tutorial will walk you through the integration of WebDataRocks with Highcharts.
Supported chart types
WebDataRocks supports the following chart types of the Highcharts library:
- Area range (demo)
- Area-spline (demo)
- Area spline range (demo)
- Basic area (demo)
- Basic bar (demo)
- Basic column (demo)
- Bubble chart (demo)
- Column range (demo)
- Error bar (demo)
- Line chart (demo)
- Funnel chart (demo)
- Pie chart (demo)
- Polygon (demo)
- Pyramid (demo)
- Scatter plot (demo)
- Spline (demo)
- Waterfall (demo)
Follow the steps below to start creating interactive data visualizations.
Step 1. Add WebDataRocks to your project
Step 1.1. Complete the integration guide. Your code of the web page with WebDatarocks should look similar to the following:
<html>
  <head>
    <script src="https://cdn.webdatarocks.com/latest/webdatarocks.js"></script>
    <script src="https://cdn.webdatarocks.com/latest/webdatarocks.toolbar.min.js"></script>
    <link href="https://cdn.webdatarocks.com/latest/webdatarocks.min.css" rel="stylesheet"/>
  </head>

  <body>
    <div id="pivotContainer"></div>
    <script>
      const pivot = new WebDataRocks({
        container: "#pivotContainer",
        toolbar: true,
      });
    </script>
  </body>
</html>
Step 1.2. Create a report for WebDataRocks — connect to the data source and define which fields should be displayed in rows, columns, and measures:
const pivot = new WebDataRocks({
  container: "#pivotContainer",
  toolbar: true,
  report: {
    dataSource: {
      filename: "https://cdn.webdatarocks.com/data/data.csv",
    },
    slice: {
      rows: [
        {
          uniqueName: "Country",
        },
      ],
      columns: [
        {
          uniqueName: "Business Type",
        },
        {
          uniqueName: "Measures",
        },
      ],
      measures: [
        {
          uniqueName: "Price",
          aggregation: "sum",
        },
      ],
    },
  },
});
The fields you’ve specified in the report will be shown on the chart.
Step 2. Add Highcharts
Step 2.1. Include the scripts for Highcharts into your web page:
<script src="https://code.highcharts.com/4.2.2/highcharts.js"></script>
<script src="https://code.highcharts.com/4.2.2/highcharts-more.js"></script>
Step 2.2. Add a container where the chart should be rendered into your web page:
<div id="highchartsContainer"></div>
Step 3. Show the data from the pivot table on the chart
Step 3.1. Import the WebDataRocks Connector for Highcharts:
<script src="https://cdn.webdatarocks.com/latest/webdatarocks.highcharts.js"></script>
The Connector provides the highcharts.getData() method, which gets data from WebDataRocks and converts it to the format required for a specific chart type.
Step 3.2. If we call the highcharts.getData() method before WebDataRocks is fully loaded and ready to use, it will return an empty result. To know when WebDataRocks is ready to provide data for the chart, handle the reportcomplete event:
const pivot = new WebDataRocks({
  container: "#pivotContainer",
  toolbar: true,
  report: report,
  reportcomplete: () => {
    pivot.off("reportcomplete");
    createChart();
  }
});
Now the chart will be created only when the data is loaded and the report is ready.
Step 3.3. Implement the createChart() function. It will use the highcharts.getData() method from the Connector:
function createChart() {
  pivot.highcharts.getData({
    type: "spline"
  },
  // Function called when data for the chart is ready
  (data) => {
    Highcharts.chart("highchartsContainer", data);
  },
  // Function called on report changes (filtering, sorting, etc.)
  (data) => {
    Highcharts.chart("highchartsContainer", data);
  });
}
Step 4. See the result
Open your web page in the browser to see how the pivot table looks in combination with Highcharts.
To see what a real-time interaction is, try experimenting: filter the data, change the measures and the aggregation functions — the results are reflected on the chart at once.
Check out the full code
After completing this tutorial, the full code of the web page should look as follows:
<html>
  <head>
    <link href="https://cdn.webdatarocks.com/latest/webdatarocks.min.css" rel="stylesheet"/>
    <script src="https://cdn.webdatarocks.com/latest/webdatarocks.js"></script>
    <script src="https://cdn.webdatarocks.com/latest/webdatarocks.toolbar.min.js"></script>
    <script src="https://code.highcharts.com/4.2.2/highcharts.js"></script>
    <script src="https://code.highcharts.com/4.2.2/highcharts-more.js"></script>
    <script src="https://cdn.webdatarocks.com/latest/webdatarocks.highcharts.js"></script>
  </head>
  <body>
    <div id="pivotContainer"></div>
    <div id="highchartsContainer"></div>

    <script>
      const report = {
        dataSource: {
          filename: "https://cdn.webdatarocks.com/data/data.csv"
        },
        slice: {
          rows: [
            {
              uniqueName: "Country",
            },
          ],
          columns: [
            {
               uniqueName: "Business Type",
            },
            {
              uniqueName: "Measures",
            },
          ],
          measures: [
            {
              uniqueName: "Price",
              aggregation: "sum",
            },
          ],
        },
      };

      const pivot = new WebDataRocks({
        container: "#pivotContainer",
        toolbar: true,
        report: report,
        reportcomplete: () => {
          pivot.off("reportcomplete");
          createChart();
        }
      });

      function createChart() {
        pivot.highcharts.getData({
          type: "spline"
        },
        // Function called when data for the chart is ready
        (data) => {
          Highcharts.chart("highchartsContainer", data);
        },
        // Function called on report changes (filtering, sorting, etc.)
        (data) => {
          Highcharts.chart("highchartsContainer", data);
        });
      }
    </script>
  </body>
</html>
Live example
Interact with the following sample where WebDataRocks Pivot Table is integrated with Highcharts to see how they work together: